
From left to right, my sister M as Cloud Strife, my sister D as Sora, and me as Squall Leonhart (aka Leon). All female versions of the male characters, and all based on the looks that they wear in Kingdom Hearts 2. I designed the female looks, and created most of the pieces. M and D each worked on some pieces, as well, and our dad made our awesome weapons out of foam core.
I'd like to go through each of our costumes (in separate entries) in a little more detail and tell you how I made the pieces. Starting with mine!

Inspiration - Squall Leonhart (Leon) from Kingdom Hearts 2


Concept art


Let's start with the jacket. I bought a 3/4 length sleeve, black, "leather" cropped jacket, Body Central brand, from swap.com.
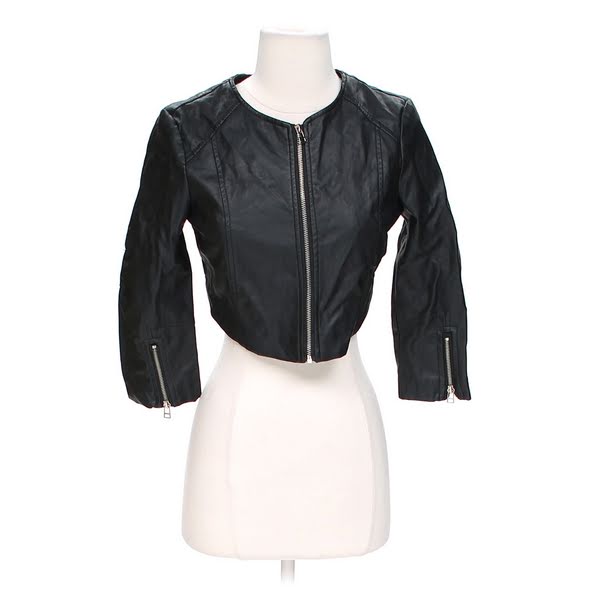
My first step was to cut off the sleeves to short-sleeve length and re-hem them. I cut them shorter than Leon's actually are, for a more "feminine" look. Then I started adding details. I found some red pleather on sale at Joann (in their home decor fabrics), and I used the lion's head necklace that I found on eBay -

- as my template to cut out the emblem for the jacket sleeve.

This one I hand stitched, since I figured it was easier than trying to get the sewing machine into all those little nooks and crannies.
The "wings" on the back of the jacket I sketched out by hand based on some screenshots I found, and I sewed them on with the machine.

For the silver edging I used metallic silver paint. Here's a pic of me baby-wearing and painting at the same time! 😂

And the finished product, minus a second coat of paint...

Next step was to add the fur trim. I bought the fur from Hobby Lobby, and getting it cut and sewn on was a tricky procedure. I had a lot of help from my mom on that one (hard to get it pinned on unless you're wearing it!), and I still can't tell you exactly how we did it haha.
The last step was to add the black panels to the front of the jacket. I used some leftover fabric from Sora's skirt, which made things interesting since it was stretchy. If you had better fabric, you could potentially turn these into pockets, which would make it easier to get them sewn on flat/straight, and be useful when it came ComiCon time. But I just decided to stick with what I had on hand.

For the white shirt underneath the jacket, I used a v-neck camisole that I already owned (it had some lace trim on it that I tacked down so as not to be TOO feminine!)
The skirt I made from scratch with some semi-sheer black fabric from Hobby Lobby and two super long zippers that I found on Amazon. I wanted it to be reminiscent of Leon's zippered pants, and look basically like a maxi that had been unzipped up both sides. Basically it was just two panels of fabric, sewn together at the top and then zippered together the rest of the way, with an elastic waistband. I tapered the skirt in toward the bottom so that it would better show off the leggings and boots underneath.

The leggings were another swap.com purchase (can you believe I didn't already own black leggings?), and the boots were from eBay. I did already have a pair of knee-high black boots, but a. they weren't the style I wanted, and b. I didn't want to mess them up by putting zippers on them! I discovered in my online searching that boots with zippers up the front are extremely rare, and if you do find them they are super expensive! So instead, I bought plain black boots and a couple more zippers from Amazon, and I glued the zippers to the front of the boots. It ended up working really well, it was not at all obvious that they weren't functional zippers. I highly recommend this glue -

- for all your cosplay needs! I lost count of how many projects we ended up using this stuff on. For the boots, I glued on a little of the zipper at a time, held it in place until it became tacky, then used painter's tape to hold it while I continued up the zipper.

Excuse the extremely messy background! I also used some rolled up cardboard (frozen pizza boxes, to be exact!) to stuff down inside the boots so they would stay upright while the glue dried.

Now for accessories...the belt that I wore around my waist actually belongs to my husband, but the other 3 I bought off of eBay. Size XL, so that they would fit all they way around my hips, though I think I could have gotten away with a size down so that there would not have been so much of a "tail" left over.
The armbands I decided to make rather than buy, to keep the cost down. They were a royal pain, mostly just because it's difficult to cut and work with leather, but they turned out well! I found a bag of leather scraps at Hobby Lobby, and cut the 3 armbands out from one large piece of brown leather. The buckles also came from Hobby Lobby. I measured my arm where I wanted the armbands to be, then added a couple of inches to that. I punched 3 holes in each one with an awl, with the center hole being the one I actually used. Then I sewed a small piece of elastic to one end of the armband, looping around the center bar of the buckle. Because of the elastic, I was able to just slide the first two armbands over my hand and up my arm. I only had to actually unbuckle the one on my wrist, since I have a really small wrist.

Sorry I don't have any photos of the actual process!
My gloves were originally basic black leather, and they also came off of swap.com.

I used more of the same leftover fabric from Sora's skirt, and finished the edges of 3 different strips to go across the gloves. I had to hand sew these, since I was going up inside the glove. The silver details I made out of air dry clay (from Hobby Lobby or Walmart), and spray painted them with the same paint I used for my gunblade. I glued them on with the E6000 glue (see above!)

I'm sure you could easily find some kind of buttons to use instead, but again, I was trying not to buy anything else! I also debated using more leather instead of fabric for the straps, but was afraid it would make hand movement difficult. Also, after all the work on the armbands, I was over the whole working with leather thing haha.
My weapon, known as the Gunblade, was made by my dad out of foam core and a Pringles can for the revolver! I painted the whole thing with metallic silver spray paint, and learned in the process that if you spray on too much at once the top layer of the foam core will buckle up. I was able to smooth it out with a straight edge, which actually ended up leaving some cool looking marks on the blade that made it look "battle worn".

The handle and the shading on the revolver I painted with craft paint. The lion emblem was definitely the most difficult part! I finally found a picture of it online that was clear enough to use, and my hubby resized it on Photoshop to the size I wanted for the blade. Here is the original file that I cropped, before resizing.

Once it was resized and printed, I used graphite paper to transfer it onto the blade. This, however, was only semi-successful. In several places the transfer barely showed up, and I had to fill in the blanks by hand, looking at the original. Then I traced over all the lines and filled in the solid parts with a Sharpie...much easier than paint and a paintbrush, and it looked just fine!

For the "keychain" on the end of the handle, I removed a few links from a plastic chain that we already had and spray painted it with the same paint I used on the sword. My dad cut a notch into the middle layer of foam core, and inserted half of one of the chain links into the notch with some glue. I created the lion's head on the end out of more air dry clay and silver spray paint.

As far as hair goes, I used a couple of different gel and wax products coupled with plenty of hairspray to get the raised bangs that Leon wears. I also separated a section of hair over each ear and held that all in place with the same products.
For makeup, I actually researched biker chick looks, and based mine off of that! Squall/Leon may not actually own a Harley, but his outfit definitely says biker to me. My sister D did my smoky eyeshadow, and my husband made Squall's iconic scar with a light bronze cream foundation and a makeup brush. Finished all that off with black eyeliner, my normal light rosy-brown blush, some highlighter, and bright red lipstick, and some finishing spray to help hold it all in place. (Tip: don't let your little sister do the finishing spray part, or you might almost drown.)

That's all for mine! To wrap up, here's a fun picture that D and I took at ComiCon, recreating a moment from Kingdom Hearts 1 when Sora and Leon first meet (even though both our costumes are different, we couldn't resist!)


Check out my Etsy shop! I sell hand painted wooden signs with a variety of themes including geek, Disney, and Christian, and I also make custom orders!
No comments:
Post a Comment