Showing posts with label wig. Show all posts

Saturday, September 17, 2016

DIY Abby Sciuto cosplay

    So, it's been absolutely forever since I've updated my blog.  ComiCon has come and gone, and we finished all of our costumes in time...whew!  It was definitely a tight race to the finish, but we made it!  Everyone had fun (other than maybe Sugarplum, who had been fighting a cold and was pretty exhausted most of the day), and my little sisters are pumped for next year already!

    My main excuse for not updating has been my computer being on the fritz...yet it's still on the fritz, and here I am, so clearly that wasn't an entirely valid excuse.  It did make things a bit more complicated - I had to get the pictures I wanted off of my super slow computer onto a flash drive, and then actually write the blog on DH's computer since mine won't currently connect to the internet.  But I'm making it work!

    Having said all of that...it's time to start recap entries for each of our costumes, so that all the info is in one place and easy to follow.  Starting with my own cosplay, Abby Sciuto from NCIS.

    Most of this costume involved searching for and ordering pieces, there were not a lot of projects to complete.  First, every Abby cosplay needs a good goth-style top.


    I was originally looking for maybe something with skulls, which for some reason was a lot harder to find than I anticipated.  Maybe if you look at this time of year it would be easier!  But I ended up finding this skeleton tank on eBay, and it's extremely similar to one that Abby has actually worn on the show.

    Next you'll need a skirt or pants.  From my research, Abby does wear some of both, but the plaid mini skirt is her most iconic look.


    I was looking for either red, green, or blue, though I was leaning toward red.  The fact that this one came with a studded belt was an added bonus...but unfortunately, you couldn't even see it once I put it with the shirt.  Oh well.  This skirt came from swap.com.

    The next important piece is a lab coat.  I found mine on eBay, and added the embroidery myself.  I'm sure you could probably find a pre-embroidered NCIS lab coat if you don't have the means to do the embroidery, though they'll probably be a bit more expensive.  


    As an added detail for the final look, I hooked an ink pen into this pocket since Abby often carries one there.

    An optional piece, depending on what type of bottom you need up with and how comfortable you are in short skirts, is a pair of black leggings.  


    I accidentally ended up with a pair with holes down the front, which ended up working well for the overall look.  Like I said, the leggings are optional, since Abby doesn't actually wear them, but I didn't personally want to wear just a mini skirt with no other covering!  These came from swap.com as well.

    A key piece of Abby's look is her knee-high socks. 


    She wears a variety of patterns, including argyle, but I decided to go with the black and white stripes.  This was another eBay find.

    Of course as we're working our way down to the feet, the next obvious piece would be a pair of boots.


    While I admit these are not the most "Abby" boots I could have possibly gone with...I already owned them, and boots are expensive!  Abby generally wears taller boots, with lots of buckles and such.  But I felt like a simple pair of black combat boots worked pretty well without having to spend all that extra money.

    If you don't already have black hair and bangs, you'll also need a wig to complete your look.


    I found this one for cheap on eBay.  Keep in mind when buying wigs, what you pay for is what you get!  So while a cheap wig ended up working for me in the end, it was a lot more work to get it that way.
    The first thing I had to fix was the bangs.  They were VERY uneven!


    As you can see, there were sections on each side that weren't short enough to be bangs, but not long enough to mix in with the rest of the hair.  I cut those off to bangs-length.  There were other long pieces randomly mixed in throughout the bangs, too.

    Next I worked on de-shining the wig, which I have written a post on already, so I won't go into detail here.


    In this picture the left section has been de-shined.  It's not a huge difference, but it's one of those subtle details that makes the wig look more realistic.

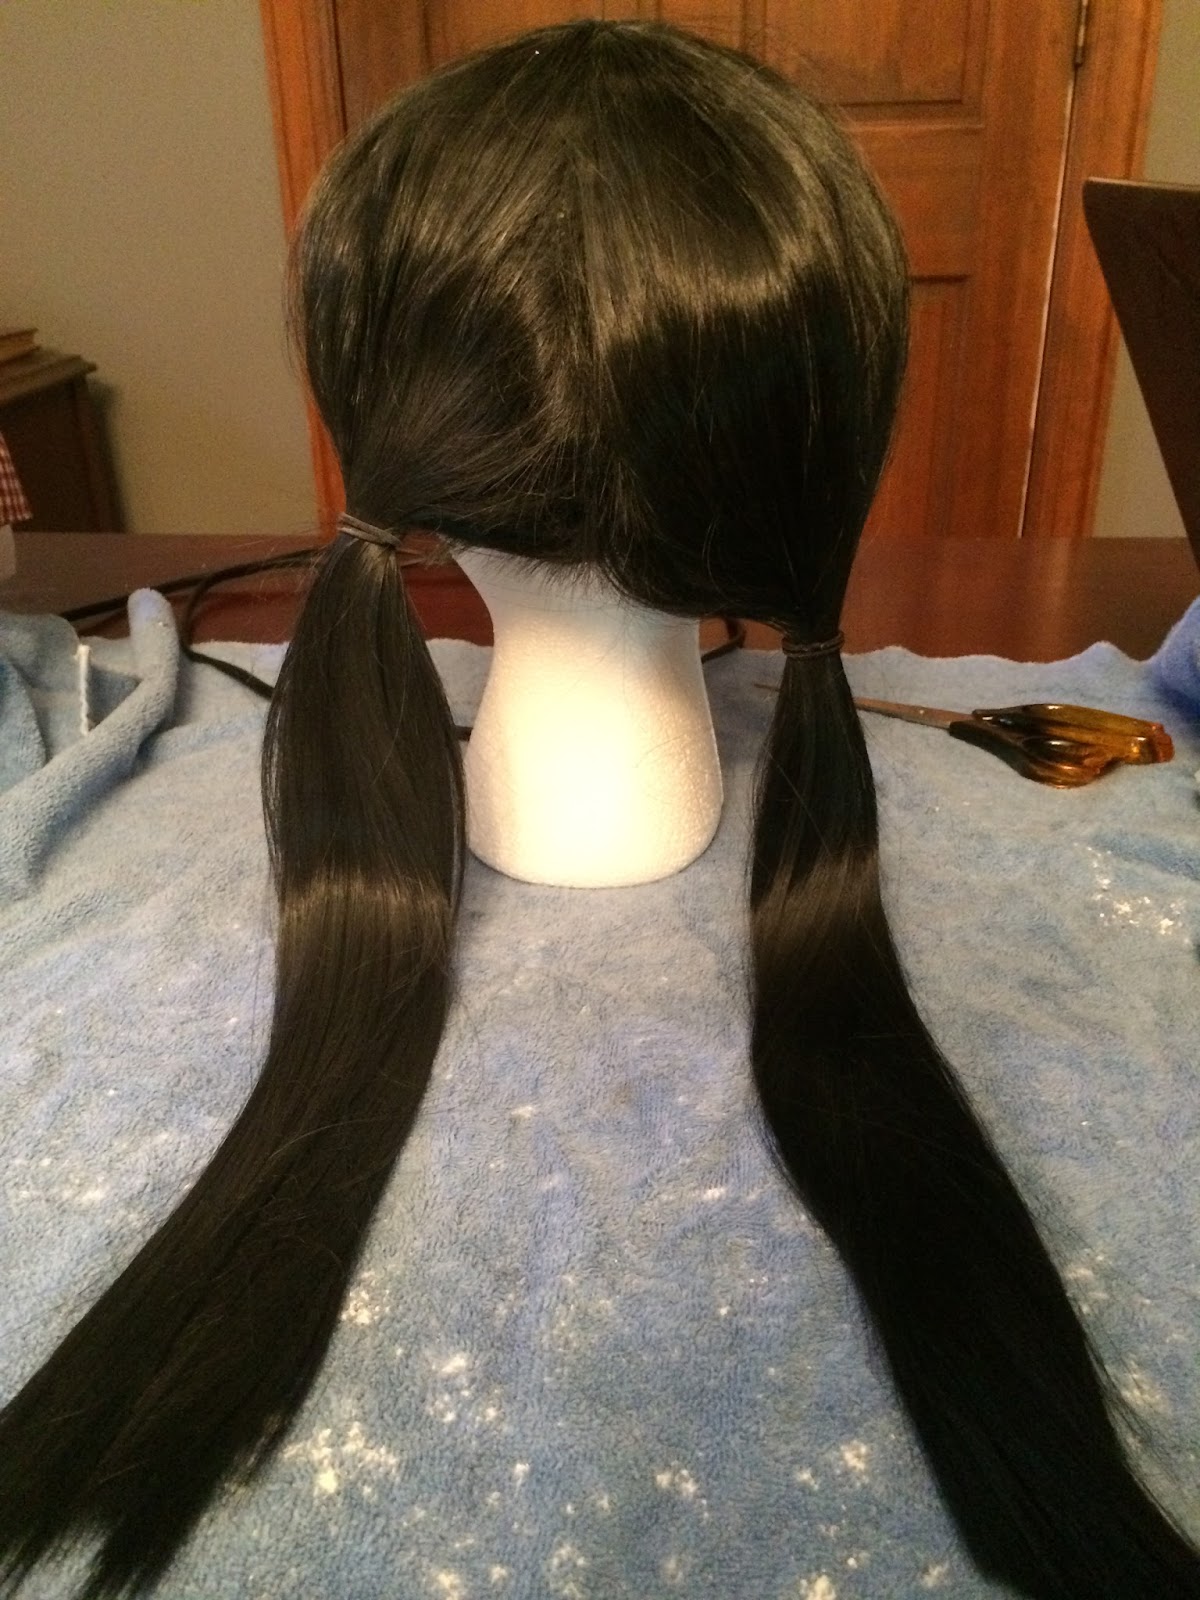
    I really wanted to give my wig Abby's iconic high pigtails.  Unfortunately, this is what happened when I tried that.


    I don't know how well you can tell without zooming in on the photo, but you can see the netting of the wig right through the hair.  Nothing I did to style the wig solved the problem!  Even with a black wig cap on underneath you could still see it.  This is probably another result of buying a cheap wig.  A better quality wig would most likely be thicker and have better coverage and styling options.  So, I ended up going with another Abby look, the low braided pigtails.


    Even this look was a bit hard to accomplish without exposing the netting underneath.  I will go ahead and admit that I got very frustrated with this wig before it was over with!  But in the end, the bit of netting that was exposed was not noticeable enough when paired with the black wig cap to continue to worry about.
   A side note...if you're going to do any kind of cutting or styling on a wig, you'll want to get one of these wig heads.  They only cost about $5 at Hobby Lobby or Jo-Ann.  Also, do yourself a huge favor and rig some kind of stand to put it on, because they are super lightweight and will fall over constantly while you're trying to style. You can see somewhat in the picture above the one that DH made for me...basically it's a board with a spike/dowel sticking out of it and up into the hole in the bottom of the wig head.

    Now for the details!  The fun stuff!  First, jewelry.  Abby loves her jewelry!


    If you're going to cosplay Abby, a dog collar choker is pretty much a must.  I got mine on eBay, and I'm pretty sure it was an actual dog collar and not meant to be a necklace!  The skull bracelet also came from eBay, and the studded cuff was something DH had lying around.  As long as you stick with metal, black, and leather, you're pretty safe to be as creative as you'd like with your bracelets.  A choker and bracelets are about as far as Abby usually goes, though.  No earrings, and if she ever wears rings I didn't notice them.

    And, of course, you can't really be Abby without the tattoos.  This is certainly the most difficult part of the whole look!  Thankfully I married an artist, so he was in charge of my tattoos, though my sister M and I each did one on my wrists to help him out.
    There are several methods for creating your own temporary tattoos, and we weighed the pros and cons of each before settling on the simple Sharpie method.  If you want to be able to print your tattoos instead of having to draw them, there is a method with water transfer paper that you should look into.  For us, the Sharpies worked well - we drew them on the night before ComiCon, and they lasted throughout the day with very little fading.  The main issue I had was with the ones on my wrists, because I had bracelets rubbing on them, but they were easy enough to touch up.  Just make sure you take your Sharpie to the con with you!  That goes along with step #10 on my guide to ComiCon, which you should definitely check out if you're headed to your first con.
    Here are a couple of pictures of my tattoos compared with Abby's, with mine being on the right.


    Another little detail you might notice in the top picture is my black fingernail polish.  Not my usual look, but definitely an Abby thing!  For makeup, I kept it simple, with black eyeliner (but not a ton), a very small amount of light blush, and dark red lipstick.  

    And here it is, the final look!


    This was such a fun new look to try, and I got a ton of compliments on how much I looked like Abby.  Even with my baby bump, haha!

    Now let's talk cost.
    Skeleton tank: $4.99
    Mini skirt: $9.00
    Lab coat: $11.79
    Leggings: free! (long story, see my costume update post for that)
    Socks: $1.76
    Boots: free!
    Wig: $6.99
    Skull bracelet: $.74
    Dog collar: $3.70
    Cuff bracelet: free!
    Makeup, tattoos, and nails: free!

    TOTAL COST: $38.97
    Now that's cosplay on a budget!  This was actually the first time I had added up the cost, and I have to say I'm pretty pleased.

    I'll eventually get around to posts on Rey, Vanellope, Samantha Parkington, and The Man with No Name.  Hopefully it won't take me quite as long this time!


Check out my Etsy shop! I sell hand painted wooden signs with a variety of themes including geek, Disney, and Christian, and I also make custom orders!

Thursday, September 24, 2015

How to Wear a Half Wig

    As promised, here is my tutorial for how to wear your half wig, or fall!


    Here is the breakdown, in case you'd rather read than watch.

    You will need:
    ~Half wig
    ~Hair clip
    ~Lots and lots of bobby pins
    ~Wig cap
    ~More bobby pins
    ~Hairspray
    ~A few more bobby pins

    Step 1:  Try on the wig to see how much hair you should leave out at the front.  It should be somewhere just behind your ears.
    Step 2:  Clip the front section of your hair out of the way.
    Step 3:  Pin curl the rest of your hair (twist sections of hair into ringlets and criss-cross bobby pins over each one).
    Step 4:  Stretch wig cap over pin-curled section of hair.  Pin into place.
    Step 5:  Take front hair out of hair clip.  Stretch wig over wig cap, starting at the front, and holding the top in place as you cover the back with the wig.  Pin into place.
    Step 6:  Incorporate the front section of hair into the wig, either by spraying/pinning back, or by braiding into the wig.

    If you hadn't guessed, I'm wearing the wig in this video and doing an Arwen cosplay for ComiCon this weekend.  My husband and daughter and I did a photo shoot a few days ago, so pictures of all the costumes will be coming soon!


Check out my Etsy shop! I sell hand painted wooden signs with a variety of themes including geek, Disney, and Christian, and I also make custom orders!

Saturday, August 22, 2015

How to remove shine from a synthetic (curly) wig

    I recently purchased a half-wig, also known as a fall, off of eBay.  I often have my hair cut to around shoulder-length, and I was tired of worrying about what length my hair was going to be by the time ComiCon rolled around!  In case you've never dealt with falls before, the purpose of them is not to change your hair color, but to extend it.  The front part of your own hair is incorporated into the wig so that it all blends in and looks more natural.
    Unfortunately I didn't take a "before" picture of the wig...I didn't have a blog at the time!  Here's the eBay version, though.

    I don't know if I would have even thought of the fact that the wig was unnaturally shiny, had I not recently pinned this article on Pinterest.  So, once the wig came in, I thought, "Hmm...here's a perfect opportunity to try this out!"  After all, the more natural looking the cosplay, the better (at least in my opinion!).
    So I bought some cheap fabric softener and went to work.  Tip #1: Make sure you like the smell of the fabric softener you use, because your wig WILL smell like it afterward!  I'm currently debating hanging mine outside somewhere to air it out.  :P  The tutorial suggested using 1-3 cups of softener, depending on the length of your wig, so I used 2.  Pour the fabric softener into a bucket or dish pan, anything big enough to lay the wig in (flipped inside out), and then add enough water to thoroughly cover the wig.  Next comes the hardest part of the process - finding somewhere to leave the bucket where babies and dogs can't find it!  Or maybe that's just me...
    I left my wig soaking for about 5 days (the original tutorial suggested 5-7).  Then take it out, letting it drip, and lay it flat on a towel to dry.  Don't squeeze it!  My wig has a good bit of hair, so I had to spread it out to get it to dry.  This process took another couple of days for me.  Also, in case you're like and me and are worried about the water messing up your curls...in my case, the curls were perfectly fine.  I watched a video another cosplayer posted of doing a similar process with their curly wig, and they had no problem, either.
    Okay, honesty time...I have no clue whether the fabric softener did any good or not.  The second step of this process is what actually impressed me.  However, I'm sure there's a reason that the article said to soak it first!  The wig did end up pretty soft, so maybe that's the result I was looking for.  However, it was not at all soft until after I finished completely, so don't worry about the fact that it is now a little icky looking/feeling.
    Now for part 2 of the de-shining process!  This part gets a bit messy, so lay out a towel (and you should probably be prepared for your clothes to get a little dusty, too).  Either lay the wig out flat, or pin it onto a wig head if you have one.  The original tutorial says to use talc, aka baby powder.  However, baby powder is no longer made of talc because it's actually toxic.  Yuck!  I never use baby powder with Sugarplum, so I was a little clueless.  But when I looked at Walmart, turns out that baby powder is now made out of "Pure Corn Starch" (plus scents, etc.).  My thought: Why would I buy baby powder made out of corn starch when I have a box of corn starch in my cabinet at home?  I even googled it, and yep, you can use corn starch instead of baby powder in most, if not all, instances.  Even on your baby's bum!  :)
    I poured corn starch into a cleaned-out spice shaker to make it easier to apply.  You will also need a wig brush...in my case, this was an American Girl doll brush!  Basically what you're looking for is a wire brush.  If you don't have American Girl dolls :), I'm sure you can find them online or at a wig store.
    Start coating your wig, section by section, with corn starch, and working it through the hair.  I rubbed it in with my fingers, and also brushed it.  If your wig is curly, just be very gentle with the ends!  It also helps to twist up each section after you finish it, to make sure the curl stays in.  You'll find your own method of applying the corn starch as you go.  I ended up deciding it was easiest to sprinkle the corn starch into my hand, then dip my fingers in it and rub it into the hair, like this:
    You'll be able to see the shine disappearing as you work!  I was able to get a pretty good "before and after" picture.  With flash:
    Without:
    You can especially tell in the picture with flash.  Natural hair doesn't reflect a flash like that!  
    After a couple of sessions brushing and corn starch-ing (you might be able to finish it in less if you're not trying to work around a toddler sleep schedule!), it was done!  

    All the curls are still intact (yay!), and it's now much more natural-looking.  Plus, it ended up matching my hair a little better in the end than it did to start with.  Which is worth making note of - the corn starch may lighten the wig ever so slightly.
    Next, check out how to wear your half wig!


Check out my Etsy shop! I sell hand painted wooden signs with a variety of themes including geek, Disney, and Christian, and I also make custom orders!