Monday, May 30, 2016

Sewing Rey's Pants

    Aka: turning dress pants into harem-esque capris!


    The journey to completing M's pants for her Rey cosplay has been an...interesting one.  A bit longer and more complicated than any of us hoped.  But they are done now, so that's what matters!  

    I mentioned in my last costume update that I had found what I hoped was the perfect pair of pants for M at Goodwill.  We really liked the color and the how the fabric draped; they seemed to match the pants from the movie well. 


    But, once I got the pants to her and she was able to try them on, it turned out they were too small, even though they were the size she normally wears!  Women's clothing...ugh.  They wouldn't even go all the way over her hips, so we weren't sure that there was anything that could be done about it.  So we started looking for other options, but I was too sick to get out and do any physical shopping (oh btw, have I mentioned I'm pregnant? ha), and it's so hard to tell what you're getting color- and fabric-wise online.  My mom ordered another pair off of eBay, but they ended up being way too gray and not at all the right fabric.  

    So, recently I was finally well enough to be able to make it back over to their house and actually see these pants in person.  My mom and I had hatched a possible plan to open up the side seams far enough for her to actually get the pants on, and then fill in the gaps with the excess fabric that we were already going to be cutting off of the legs.  Thankfully, that worked (that is, after my pregnant brain decided to use a completely wrong measurement the first time and make them way huge on her), and the pants now actually fit her.

    But anyway, assuming that you actually buy the correct size pants for your cosplay, what you'll really need to know how to do is to make them fitted at the knee like Rey's are.


    Most capris that you find are going to be fitted through the leg, unlike Rey's.  So the easiest thing to do is to find a pair of long dress pants that are loose fitting, or possibly a pair of gauchos.  Try the pants on, mark a spot just under the knee where you want them to end, allowing some extra room for seam allowances, etc., then cut both legs off at this mark.  

    Next you'll need to create a cuff for the ends of the pants.  Measure around the largest part of your calf, even if that's not where the pants will actually end.  You want to make sure the cuff can slide all the way up to where it belongs!  Use some of the fabric that you cut off to make the cuff.  In my case, the original bottom of the pants had a very wide hem, just the right width for my cuff and already nicely finished off for me.  If you don't have this luxury, then I suggest 2-3 inches wide, and you'll need to hem one side.  You can choose either to cut one long strip, the length of your calf measurement (plus seam allowances), and sew the ends together (right sides together) to create a loop, or cut 2 pieces of equal length and sew those ends together (right sides together).  I did the latter.


     Hope you're still with me so far!  I pretty much make this stuff up as I go, so I'm certainly not an expert at explaining it all.  

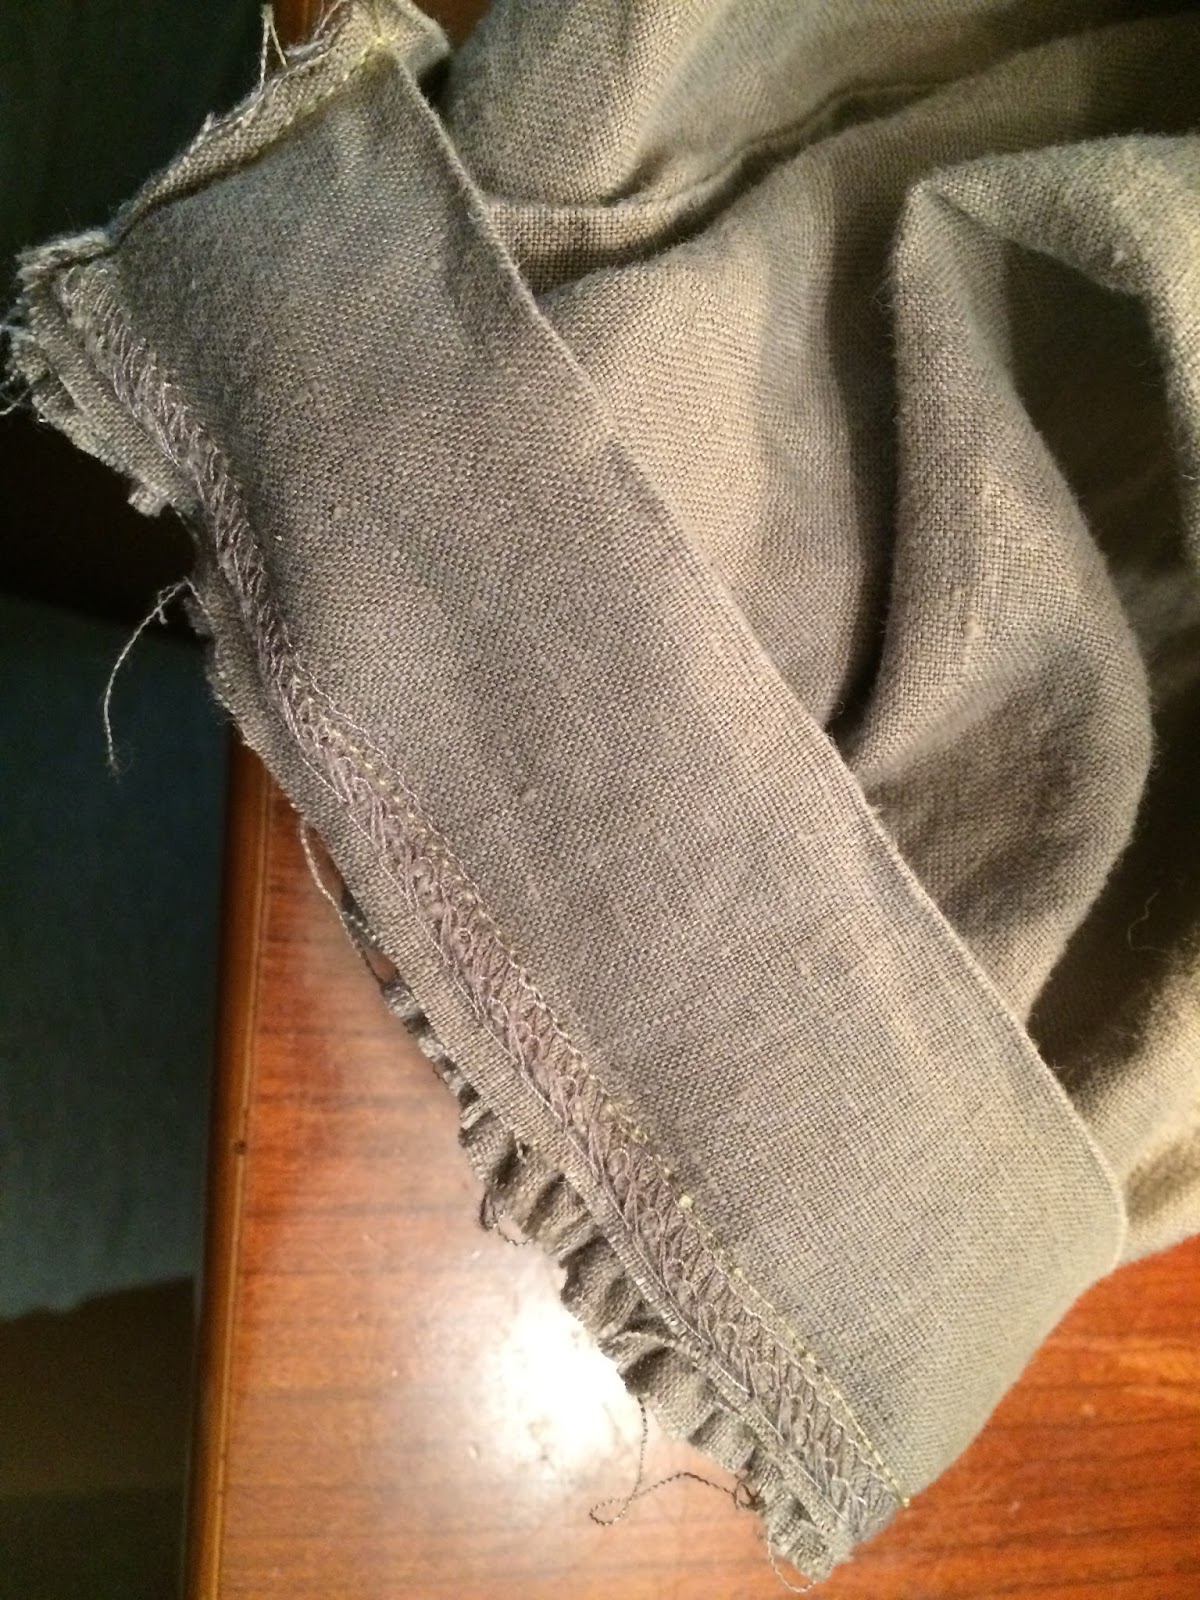
    Okay, your next step is to gather the end of the pants.  Run a double gathering stitch (long stitch length) along the edge, then pull the threads until the pants are gathered enough to just fit inside the cuff.  You'll need to do this one side of the pants at a time, since the existing side seams won't gather. 


    Getting it to the right size will take a little bit of trial and error; just place the cuff around the gathers and readjust as needed.  It's easiest to gather a little too much to start with and then pull it back out a little once you're holding the cuff on.

    Next, once you've tied off your gathering stitches, turn the cuff inside out and pin it over the end of the pants.  When you sew this, make sure that you leave enough seam allowance to cover up all of your gathering stitches.


    Turn right side out, repeat on other leg, and ta da!  You're done! 


    Didn't get a picture of the finished product on M, but there will be plenty to come.  At this point I'm trying to decide whether there's some kind of tie on Rey's pants, around the cuff.  Anybody have any input on that one?  I have plenty of fabric still left over, so I can easily add one at the last minute if I decide I want to.

    Another quick update on how everything else is coming:  Now that we have the pants done, M's costume is basically finished other than acquiring the fabric to wrap around her arms.  
    D's Vanellope costume still needs stripes painted on the leggings and stitches added to the hoodie pocket, and we need to make candy clips for her hair.  She does have her hoodie strings dyed pink, and she actually ended up getting a different pair of white leggings and dying them the correct color to better match her hoodie.
    DH finally found a hat for his "The Good, the Bad, and the Ugly" cosplay!  However, it needs some work before it's ready to go.  Also, we bought some fabric for his poncho, but it still needs to be made and the design painted on.  Those are his two main pieces that needed work.
    Sugarplum's Samantha dress is nearly finished.  All the sewing is done (and was that a task! I hate patterns so much!), all that's left is to finish tacking down the ribbon belt and to find a gold piece to be the "buckle" at the center of the belt.  I also bought her some black stockings this weekend.
    This week I'm excited to finally get back to work on my Abby Sciuto costume!  All of the pieces did come in, and they all look great.  Today I gave my wig a slight haircut, and over the next couple of days I hope to work on de-shining the wig and styling it.  That will probably be my next post, so keep an eye out!


Check out my Etsy shop! I sell hand painted wooden signs with a variety of themes including geek, Disney, and Christian, and I also make custom orders!


Wednesday, March 9, 2016

Costume Updates

    I spent last week at my parents' house, and one thing my sisters and I did was work on acquiring pieces for their costumes.  Combine that with some of the other buying and crafting I've done recently, and I've been pretty productive on the costume front lately.  So...time for an update!

    Abby Sciuto Cosplay

    The first item to arrive for my Abby costume was a skull bracelet that I found on eBay for $.79 and free shipping.  Can't beat that!


    Next was the lab coat...also from eBay...which I failed to take a picture of before I embroidered.  But I made up for it by taking a video of the embroidery machine at work!


    Am I the only one who finds watching embroidery machines fascinating?  Yes?  Ok, fine.  Here's a still shot of it for all the rest of you.


    And here is the final product!


    Today the skirt and leggings came in the mail, too...


    Funny story about these leggings.  I didn't realize when I ordered the that they had holes down the front.  That was very unclear in the picture/description.  And while that look may be appropriate for Abby, I was hoping to be able to wear these myself, and that's NOT my style.  So I went back on swap.com to return them, and they told me they'd give me my money back but that I could keep the leggings for my inconvenience.  That's the second time swap has done that to me!  So now, I guess I'm going to use them after all...I mean, they were free!  My one concern was that they wouldn't look right when I paired them with the knee socks (which haven't come in yet for me to try), but I think it'll look fine.  I'm definitely glad I have the leggings, because that skirt just BARELY covers me!

    Still waiting on my shirt, dog collar, knee socks, and wig to arrive, but they're all coming from China :/ so the estimated arrival puts them here anytime between next week and mid-April.

    Samantha Parkington Cosplay

    Sugarplum's costume is the most labor-intensive, and also the one that I've accomplished the least on.  Gotta make myself sit down and sew!  Some of it has to do with finding the time...the perfect day when Sugarplum herself will actually cooperate and LET me sit down and sew!

    Anyway, I did buy the fabric from Hobby Lobby.  As I said in my last post, it's not exact, but it's the closest I could find.

    I also found this ribbon at JoAnn to use for the waistband.


    This is the pattern I'm going to be using, found on Etsy. 


    I've cut out all the pieces, and ironed the fabric, so my next step is ironing the pattern pieces and then pinning and cutting everything.  It's been so long since I've actually sewn with a pattern, it makes me a little nervous.  Funny that having instructions and a guide would make me more nervous than winging it.

    Lastly, I found a pair of black patent leather shoes on eBay.  I got them a little big in hopes that she'll still be able to wear them next winter to church.


    Rey Cosplay

    My sister M's Rey cosplay is coming along well.  First I found her a pair of pants at Goodwill.


    They're a little more grey in person than they look in this photo.  I need to cut them off at her knees and hem them, but other than that they're the perfect fabric (linen-esque) and color.

    We finally decided on some fabric, from JoAnn.  Hobby Lobby had the same type of fabric labeled as batiste, but I'm not sure if that's the correct name for it or not.  Regardless, it seemed to be the perfect texture for the fabric that drapes around Rey's shoulders.  I measured from M's knee, up over the opposite shoulder, and back down to her knee, which turned out to be 2 1/2 yards.  Since the fabric comes 45" wide, I just bought that length, and cut the fabric in half lengthwise to make a strip for each shoulder.  No need to have 45" worth of fabric gathered up on her shoulder!


    Here's a picture of Rey's costume for texture comparison.


    The other item we found for her cosplay last week was a shirt.  


    We bought this off-white fitted tee from Walmart, and I'm going to make a couple of alterations to it.


    You can just barely see in this picture where I've marked the collar and sleeve.  On the collar I'll be cutting a small "v".  The sleeves are supposed to be cap sleeves, so I'm going to cut them off shorter and re-hem them.

    We already own the belt and leather wrist cuff, so now we just need to find her some boots and some kind of fabric to wrap around her arms.  She decided to forego the staff...too expensive and too much of a pain to carry around all day!


    Vanellope von Schweetz Cosplay

    My youngest sister D's cosplay is also nearing completion.  It took us awhile to find the perfect hoodie...there are a lot of teal hoodies out there, but most of them have logos and/or zippers on the front.  Also, finding the perfect color teal is easier said than done, especially without paying through the nose for it!  But I finally came across this one on eBay, which was a great price AND (contrary to what this picture shows) is the perfect color.


    Not too blue, not too green, that's the key with finding teal!  D kept this one with her, and is planning on dying or changing out the strings to hot pink, as well as adding the hot pink stitching on the pocket.
   
    She's also going to be working on her leggings.  We found these at Walgreens, of all places.


    For color comparison purposes, these are slightly bluer and a good bit darker than her hoodie.  I saw a tutorial on Pinterest for how to paint white tights to look like Vanellope's, but we figured that painting teal ones with the white stripes would equal less paint, and they'd be less likely to be stiff.  Hopefully we were right!

    Another swap.com purchase was her skirt, which just came in the mail today, so she hasn't actually had a chance to try it on yet.  It *should* be the right size, though!


    Now all she needs is some shoes and some candy for her hair, and she'll be good to go!

    I didn't include DH's Clint Eastwood cosplay in this list, because he hasn't acquired any new items yet.  :)  He's having a really hard time finding a hat that meets his standards without costing $100 +!  Unfortunately it's not one of those things you can just pick up on eBay or at Goodwill for a few bucks.  

    Eventually, when everything is complete, I'll try to compile all of these into separate, single posts, so that all the information about each costume is available in one place.  But for now, I find it fun to be able to share my progress as it comes! 


Check out my Etsy shop! I sell hand painted wooden signs with a variety of themes including geek, Disney, and Christian, and I also make custom orders!

Friday, February 26, 2016

New year, new costumes!

    For the past couple of years, I have started thinking about my costume for ComiCon at the beginning of the year.  Sometimes it takes me a while to decide what I want to do, and I want to make sure I have plenty of time to accomplish making the costume or putting it together if it ends up being complicated.  Like my Arwen dress last year, for instance!  This year it was particularly important to start early, since I not only have my costume and Sugarplum's costume to plan (plus helping hubby out if he needs any sewing done), but my two little sisters have decided to come with us, too!  I'm super excited about introducing them to cosplay and ComiCon.  I always say that my husband turned me into a geek, and I pretty much passed it on to these two (and my older sister to some extent, too!).  We were all already Disney geeks, but DH got me into Star Wars and Lord of the Rings, and I in turn introduced my sisters.  Haven't gotten them on Doctor Who yet...maybe that'll come next. ;)

    Anyway, it turns out that most of our costumes won't require that much sewing this year, other than Sugarplum's.  Which is even more of a good thing considering what I just found out earlier this week...Wizard World, the convention that we usually attend in September, isn't coming to Nashville this year.  That means our only choice now is FanBoy Expo, which I don't know much about, but it looks like it'll be good.  There's one in Nashville in May, and one in Knoxville in June.  That leaves us only around 3 months to get everything ready!

    Thankfully, everyone has made up their minds on who they want to be, though it did take us a while.  We debated for what seemed like forever on whether or not we could come up with a group cosplay, like maybe all cosplaying as characters from The Force Awakens.  We ended up scratching that idea, because in every scenario at least one person was going to end up settling for a costume that they weren't necessarily thrilled about.  I really wanted my sisters, especially, to be whoever they really wanted to for their first ComiCon.

    So, without further ado, here is what we have all decided on for this year's ComiCon, and our progress so far.

    My costume: Abby Sciuto from NCIS


    I watched the show NCIS faithfully for a few years.  Now I mostly see re-runs, but Abby has always been a favorite.  I mean, who doesn't love Abby?  So far her outfit has been pretty fun to put together.  I really couldn't have chosen anyone whose sense of style was more different from my own!  But that's actually what makes it so much fun.
    So far I have ordered a lab coat, which I plan on embroidering with "NCIS" myself; a black wig, which I will be cutting and styling; black and white striped knee socks; a black spiked dog collar; and one skull bracelet.  All of those came off of eBay.  I already own a pair of black combat boots that I'll be using.  Still keeping my eye out for a plaid skirt, another bracelet, and some sort of skull/skeleton top.  Also a pair of black leggings, because the knee sock and mini skirt combo is a little....bare...for me.  DH will be helping me with the tattoos when the time comes...I have zero tattoos, and Abby has 7 that will be visible!  We haven't quite decided yet what method we'll be using for those, so I'll keep you updated and probably post a tutorial later on.

    DH's costume: The Man with No Name from A Fistful of Dollars


    I've only actually seen parts of this movie a couple of times, honestly, so I don't know that much about it other than this guy is the gun-slingin' hero!  DH searched for a while for a character that he could pull off with his current beard and hairstyle.  We've discovered in the past couple of years that there really aren't very many bearded characters, besides old men and wizards!  Anyway, he already owns at least a couple of pieces for this look, including the shoes and vest.  He's currently looking for the hat (I told him just to wear his Indiana Jones hat from last year, but he claims that this is a pretty specific hat, haha.  Shows you what I know.).  We're thinking for the poncho we'll end up buying or making a plain brown one, and then painting the designs on.  You can actually find this specific poncho for sale online, but they're quite pricey.

    Sugarplum's costume: Samantha Parkington, an American Girl


    My sisters and I all grew up with American Girl dolls.  I didn't personally own Samantha until I was a teenager (I started collecting the dolls as they were being discontinued), but my older sister did.  I chose Samantha for Sugarplum because they look the most alike.  :)  This will be the one costume that will be sewn completely from scratch.  And let me tell you...that fabric is NOT easy to find!  It's technically a burgundy and grey gingham print on a kind of taffeta like fabric, but no such thing seems to actually exist in the real world.  I've had to settle for a burgundy gingham on cotton, which I found at Hobby Lobby for ~$3.50 a yard sale price.  It's certainly not exact but it's the closest I could find...well, there was one slightly closer that I found online, but with the cost of shipping it would have been $25 total at least.  It wasn't different enough to pay that much.  
    I also have the ribbon for the waist, and a pattern for a very similar looking girls' Victorian dress, which I found on Etsy.  I ordered a pair of black patent leather dress shoes from eBay, but I'll still need to find the black stockings, and something to use for that gold ring on the belt.  

    M's costume: Rey from Star Wars: The Force Awakens


    Despite the fact that we decided not to go with a group Star Wars cosplay, there will still be one TFA character in the bunch.  My 18-year-old sister is going to be cosplaying Rey, the heroine of the movie.  As soon as I saw Rey I knew that she'd be a good character to be...her outfit just looks so comfy and fun, doesn't it?  We haven't done much shopping for my sisters' costumes yet, since we'd like to do it together and they live a few hours away.  I'm planning on visiting next week, though, and I'm sure we'll get a lot accomplished then.  However, I did happen to pick up a belt much like Rey's at Goodwill a few months ago on a whim, and I found a perfect pair of pants (that I'm hoping will fit!) at Goodwill a couple of days ago.  They're long pants, so I'll have to cut them off and tie them at the knees.  Right now I'm on a search for the perfect fabric to drape around her...something light and flowy but not super expensive, which is easier said than done.  The other piece that may be difficult to find is the boots, unless she has something already that I don't know about.  I'm sure we won't find anything too exact, but as long as they're close in style and color I think she'll be satisfied.

    D's costume: Vanellope Von Schweetz from Wreck it Ralph


    My 14-year-old sister changed her mind multiple times, but finally decided on Vanellope.  We haven't gotten any pieces for her costume yet - though I believe she said she had some shoes that would work - but we have made some plans.  I found a tutorial on Pinterest for painting a pair of white tights to look like Vanellope's, and we've talked about how to do the candy for her hair.  She wants to use real candy, so we plan to glue it onto bobby pins.  We may even thread a wire through an actual Twizzler to wrap around her ponytail!  Finding a teal hoodie that doesn't have a zipper down the front is proving harder than I would have thought, so there has also been talk of buying a white hoodie and dying it the correct color.

    And there you have it!  We ended up with a very random combination of characters, but I think we're all happy with what we've decided on.  There will be progress reports to come, so stay tuned!


Check out my Etsy shop! I sell hand painted wooden signs with a variety of themes including geek, Disney, and Christian, and I also make custom orders!

Tuesday, December 1, 2015

Christmas Tree Craft Project for Toddlers or Preschoolers

    It's December, so let's start out the season right!  This is a project that I came up with based off of something similar my sisters and I did when we were little.  I will be perfectly honest with you up front...if you are attempting this with a toddler, it will not be the easiest thing to accomplish.  Make sure you start out with plenty of patience, and leave behind any OCD tendencies (this one can be difficult for me!  I'm not often OCD, but when it comes to symmetry and the placement of things I am).  However, having said all of that, Sugarplum did really well, and it really wasn't all that bad.  She did try to pull the "ornaments" back off the tree, but she enjoyed the project and did well with the concept.

    Okay, prep time.  The first thing you'll need is two sheets of construction paper, one green and one white (or whatever other colors you want your tree and background to be).

    Fold the green sheet in half lengthwise.

    Cut out the shape of half of a Christmas tree on the fold.  I freehanded mine, since it's a pretty simple shape.  But if you'd rather, you can search for "Christmas tree pattern" on Google images and come up with lots of options.  Just print one out in an 8x10 size and cut around it on top of the green paper.

    Next, unfold the tree and use stick glue to adhere it to your white background.  Be generous with the glue, and make sure to hit the edges and points well.  I recommend using a scrap piece of paper underneath the tree.


    Let this dry for a few minutes before you start the project with your child.

    The other items you will need are tissue paper squares.  I used red, yellow, and white tissue paper.   Fold a sheet of tissue paper up and cut on the folds until you have approximately 2 inch squares (this is the part that is slightly time consuming!).

    To make the ornaments for the tree, you'll take these squares and crumple them up into little balls.  You can do this as part of the prep if you'd like, but I just made the balls as we worked.

    Find a good work surface that your child can easily reach.  I took the tray off of Sugarplum's highchair and let her work at the kitchen table.  Place the tree in front of your child, hand them an ornament (yes, they may try to un-crumple it!), and let them place it wherever they want on the tree.  Then use the glue stick to stick down the ornament in that spot.  Another alternative, particularly for slightly older children, is to let them point to a spot on the tree where they'd like the ornament to go.

    You could try using regular Elmer's glue as well, but I didn't want to deal with wet glue and a toddler at the same time.  The stick glue worked perfectly well for us.

    Be sure to write the child's name and the date on the back, then hang their masterpiece for everyone to admire!


Check out my Etsy shop! I sell hand painted wooden signs with a variety of themes including geek, Disney, and Christian, and I also make custom orders!

Friday, November 6, 2015

Briana's Guide to ComiCon for Cosplayers, Moms, and Everyone Else

    Well, it's taken me long enough, but I'm finally here to talk about ComiCon.  I wanted to not only share our experience at this year's Con, but also answer some questions that some of you might have about ComiCon in general.  Caution...long post ahead!    First off, what is ComiCon?  And the question I get the most, what do you do there?  There are many different ComiCons (comic conventions) out there.  Two of the biggest happen to be San Diego and New York, and are probably the ones you'll hear about the most often.  San Diego ComiCon, which takes place sometime in the summer, seems to be where most of the big announcements about upcoming movies, tv shows, events, etc. take place.  Movie trailers for highly anticipated movies in the geek world (think Star Wars, Marvel, etc.) will debut, and you're more likely to see the "big" celebrities there.

    But there are several companies who put on conventions around the country, including Wizard World, DragonCon, FanBoy Expo, etc.  The one that comes here to Nashville is Wizard World.  It's a much smaller convention than San Diego and New York, but still generates a good turnout.  My main complaint about it is that the celebrities for Nashville in particular often seem to be "has-beens", for some reason.  Other Wizard World cons don't seem to be the same way.  Perhaps it's because the Nashville con has only been going on for 3 years.

    So what do you do at ComiCon?  Well, if you're not in San Diego watching movie trailers and hearing grand announcements, the main activities will be 1. Celebrity panels and workshops, 2. Autographs and photo ops, 3. Exhibits and vendors, and 4. People watching.

    First, whatever celebrities are attending the convention will likely hold some kind of panel where they'll chat about their past, present, and future projects, and have a question and answer session.  This takes place in a separate meeting room, away from the main exhibit hall.  Sometimes there will also be panels hosted by "non-celebrities" who are experts on a particular subject...for instance, we attended a Doctor Who panel two years ago where a few people who were close to the series were discussing and speculating on the 50th anniversary special.  There are also usually some workshops available where you can learn about cosplay, comic book writing and drawing, etc.

    The celebrities are also available for autographs and photo ops, and sometimes VIP meet and greets.  At our con they each have their own booth set up in the exhibit hall where you can line up for autographs, and then a separate booth where they take turns doing photo ops.  However, this generally costs an arm and a leg, so we have never participated in this part of ComiCon.  Maybe one day, if someone I care enough about to pay $50 to have my picture taken with them shows up...maybe.  In the meantime, we just creep on them from a distance while they sit in their booths.
    The main physical area of the con is the exhibit hall.  This is where you'll find most of the people, so it's a prime opportunity for the last thing on my list, which is actually my favorite - people watching!  I've always loved people watching, and when half of those people are in costume it makes it so much better.  Of course the costume contest is the best way to see a bunch of costumes all at once, whether you participate or just watch.  Anyway, the exhibit hall is home to dozens of booths, mostly vendors selling everything geek you could possibly imagine.  We also have rows of artists, some famous and some local, displaying and selling their geek related artwork.

    To give you a taste of what the exhibit hall is like, I took a quick video while standing in the middle of it all.

    Now that you understand ComiCon a little better, time to share our costumes from this year!  Oh, and in case you're BRAND new to all of this, I'll answer another quick question...what on earth is cosplay?  Basically, it's a fancy word for geeky adults playing dress up as their favorite characters.  And it's FANTASTIC!!


My Arwen Undomiel cosplay


DH's Indiana Jones cosplay


 Sugarplum's Arwen Undomiel cosplay


    Later on I will have more detailed posts on these looks and how to create them for yourselves.

    So now for my general survival guide to ComiCon.  A lot of these tips will be geared toward cosplayers, but many can apply to anyone.

    1. Plan ahead.  

    If you are cosplaying, you should start thinking about your costume as soon as possible.  Of course I usually start thinking about next year's costume before I've even been to this year's con, but if it's your first time, find out when your con is and then start brainstorming now!  The more time you have to make your costume or find all of the pieces you need, the better it's going to turn out.

    2. Wear what you want.

    If you're a seasoned cosplayer who puts a ton of time and attention into your very detailed and accurate costume, great!  You'll probably get lots of compliments and people wanting to take your picture.  If you're brand new to the whole cosplaying thing and don't really have the time, money, or desire to put a whole lot into it, that's perfectly fine, too.  I have seen just as many people wearing off the rack costumes as those with handmade ones.  Now, as you go to the bigger conventions, you'll probably see more of the elaborate stuff and may find more people who are persnickety about the "art of cosplay".  But hey, I say if you want to cosplay, do it, no matter what it looks like.  And finally, if you really aren't into the whole cosplay thing but still want to do ComiCon, that's great, too.  I'd say only a quarter to a half of the people at our con are cosplayers.  It's just as acceptable to show your geek pride by wearing your favorite Superman or Minecraft or Ninja Turtle t-shirt.  Try doing what some people do and pair it with a lightsaber...and a Deadpool mask...and a Jayne Cobb hat.  Seriously, I see those people all the time.

    3. Double check the schedule.

    If other conventions are like ours, they will post a schedule online before the weekend of the event.  That's great, but I definitely recommend double checking the schedule once you get there.  You may find that everything is exactly the same, but things happen.  Celebrities cancel, rooms get switched, etc.  For us, this means going to each meeting room where events are supposed to take place and reading the signs outside the doors...don't even trust the brochure that they hand you, because that was printed ahead of time and won't reflect the last-minute changes.

    4. Register for the costume contest ASAP.

    Most conventions that I've seen have a costume contest sometime over the weekend.  At ours, it's at the very end of the day on Saturday.  If you want to participate, find out when it's happening and how to register right after you get there.  They may or may not advertise it, but it can fill up super quickly.  Try asking at the information desk, they will probably have the sign in sheet.

    5. Pace yourself.

    Our con is a weekend long event.  You have the option to go just one day, or up to all 3.  We have only ever gone one day, because we get done everything that we want to in one day with no problem.  But just that one day completely wipes us out!  It's a lot of being on your feet and walking back and forth through a quite large convention center, often in a costume that's not necessarily the most comfortable thing you've ever worn.  Thankfully, the panels provide a great excuse to sit and rest a while, and are also prime opportunities for feeding little ones (or yourself!).  In between panels, though, I definitely recommend finding other times to sit in a quiet place and catch your breath, most especially if you have children with you.  While you're checking the schedule (see tip #3) is likely a great time to scope out quiet corners to come back to later when the kids need a nap, or just a break from all the stimulation, or to hop out of their strollers or carriers and stretch their legs for a bit.  Also, don't feel the need to stay the WHOLE day.  We like to stay until the very end because of the costume contest, so we don't get there first thing in the morning when it opens.  And like I said, we have never had a problem getting everything in (though I'm sure at bigger cons it's harder).

    6. Bring your own food.

    Some conventions might not allow this.  Ours doesn't seem to have a problem with it.  And seriously, if you value your budget at all, you really need to bring your own food.  If you can't, I would even think that leaving the con for a while to go to a nearby fast food place would be a better option.  The food at ComiCon is OUTRAGEOUS.

    7. Have a dress rehearsal.

    This is one that we didn't do ourselves until this year, but we will be doing from now on.  You just never know what might happen the morning of the con if you are trying on your costume in full for the first time.  That hairstyle or wig might not be as easy to accomplish as you thought it was going to be, or you might find a small alteration you want to make to your costume.  It's a great time to figure out things like shoes and undergarments that are important but can be easy to overlook in the grand scheme of things.  Plus, you've worked super hard on this costume (or maybe not, but you love it anyway!) and you need pictures!  Don't leave those until the last minute, especially if you're trying to get to ComiCon at a decent hour.

    8. If at all possible, wear comfortable shoes.

    This goes back to tip #4.  Some costumes require very specific shoes, and they may not be comfortable.  If you're really committed to your costume, there's nothing you can do about that.  But if you have the option (such as my Arwen costume where you couldn't see my shoes), wear something comfy that you won't mind standing and walking in all day.  If you have to wear heels or something equally uncomfortable, please do yourself a favor and do everything you can to stave off blisters and achy soles.  Dr. Scholl's, Band-aids...you get the picture.

    9. Seriously consider whether or not to bring a stroller.

    Don't get me wrong here, I have brought a stroller the last two years and will probably continue to do so.  I know some mamas wear their babies all the time; I personally do a little of both.  But at ComiCon, for me, it would be too tiring to wear her all day (see tip #5).  Plus, wearing a carrier would cover up the entire top half of my costume.  So a stroller can be a good idea.  However, I just think I should warn you, pushing a stroller around at ComiCon is a PAIN.  There are so many people who are not watching out for a stroller coming through, randomly stopping to look at merchandise or take pictures without paying attention to their surroundings, squished between lots of booths.  It's an exercise in patience, that's for sure!  But no worse than going to a theme park or something similar.

    10. Whatever you use to get ready, take it with you.

    Hairspray, gel, bobby pins, safety pins, makeup...no matter what you needed to get ready to go, take some extras with you.  Even if you make it through the day with no mishaps to your look, you'll be able to refresh right before the costume contest.

    11.  Have fun, take pictures, geek out!

    Self explanatory.  ComiCon is the one time to see so many like-minded geeks gathered together in one place and having a great time celebrating their geekery.  Yes, that sentence was ridiculous.  So is ComiCon.  But it may the most fun ridiculous thing you do all year!

    Alright, time to wrap up this super long post.  Just a few more pictures of our 2015 ComiCon experience before I go!


Firefly panel with Jewel Staite and Adam Baldwin

Taking a leg-stretching break

Waiting for the costume contest


Check out my Etsy shop! I sell hand painted wooden signs with a variety of themes including geek, Disney, and Christian, and I also make custom orders!